
Its vital that you backup your data so that in the event of a computer failure you do not loose all the information you have in AIMS.
AIMS has it’s own built in backup system which crates a zip file of your tables and database.
To use this you first you need to decide where you want to back your data up to.
If you use the local drive by itself then in the event of a disk failure you will loose both your data in AIMS and your backups.
We recommend that you use something like Dropbox or Google Drive for you backups. Both of these will allow you to create a local folder to save the data to which will then automatically synchronise to the cloud.
Both Google Drive and Dropbox provide free personal accounts which you can use for this.
Here we will look at using Dropbox.
You can create a free dropbox account at:
Then download and install the app on your computer to ensure that the files synchronise with the cloud account
https://www.dropbox.com/install
The app will create a Dropbox folder under your user account.
Create a folder in there with a name such as VAIMSSBACKUP. You can use what ever name suits you best, but please ensure there are no spaces in the name

Once you have created the backup folder you need to tell AIMS where it is.
This is done via the preferences form.

This will bring up the backup form. On the control in the left select the Backup page.
Click on the Change Backup location button to bring up a windows directory selection dialogue.
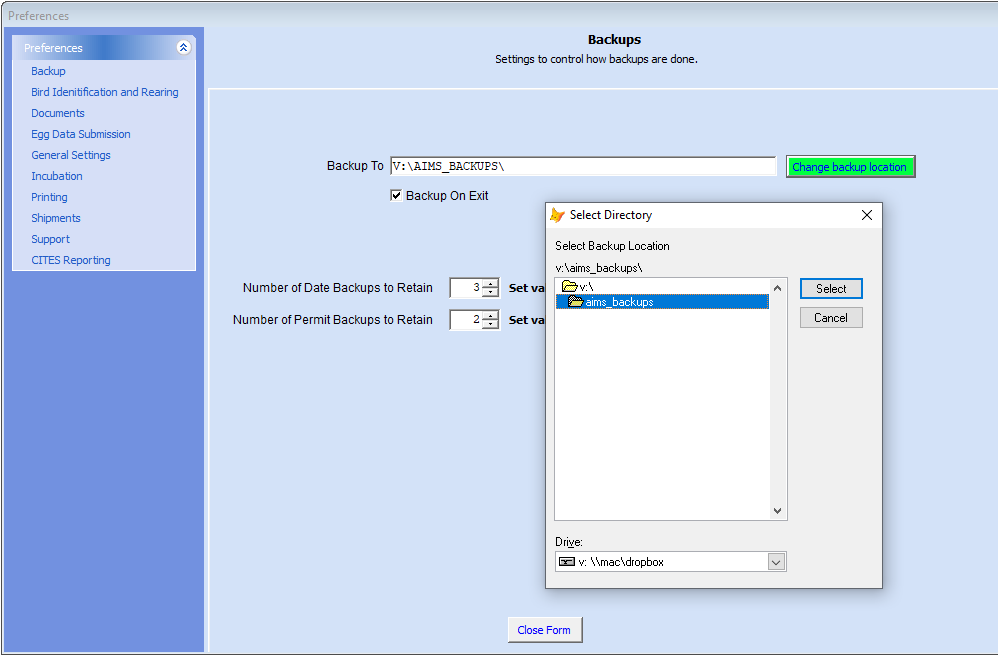
Select the location you want to use for your backups

Be sure to tick the backup on exit tick box.
If this is ticked every time you close AIMS down it will ask you is you want to backup, say yes and AIMS will bring up the backup form.

Click on the Start Backup button and AIMS will backup the data

If you want to change the location for the backup, just on this one as it will not alter the settings in the preferences, you can click on the Change Backup Location button.
This will bring up the same windows explore control as earlier and you can select where you want to make this individual backup to, a USB stick for example.
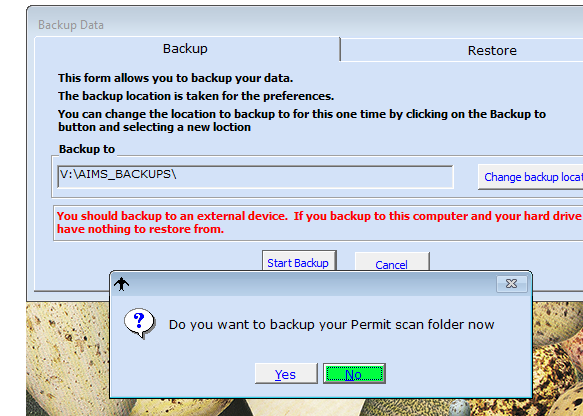
AIMS will also backup your Permits folder.
It will ask you if you want to do this.
Introduced in Version 11.3 you can now select how many backup you want to retain of you data folder and the Permits folder.
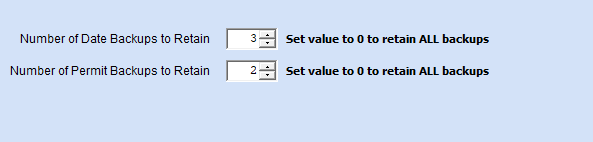
When you backup AIMS will keep the latest backups of each as set by this entry.
So if you select 3 it will retain the last 3 backups.
The Data folder is quite small, but the Permits folder can be quite large as it contains PDF files that do not compress much from their original form. It can contain hundreds of PDF files in time.
Setting either value to 0 will retain all backups.
On a new installation or AIMS or if you upgrade from an earlier version the default values for these are 0 for the Data folder and 3 for the Permits folder.
These values were selected so that AIMS did not delete any Data backup when updating.
Set the value to what is best for you.
I personally use 3 for each.
Restoring your data #
To restore your data select the Restore tab on the form.

Click on the Restore Data button and after a few warning asking if you really want to do this as it will overwrite all your existing data it will being up the explorer control allowing you to select the backup file you wish to restore from.

The naming convention for the files is the version of AIMS that created the file then the date and time of creation.
Once you select the file you will be show the details of it and asked if you want to restore this data set.

Select Yes to restore the data.
AIMS will then restart and run some data checks on the restored files to ensure they are fully compatible with your current version.
You can access the Backup and Restore form at any time from the File menu

One use for this is to allow you to explore the features in AIMS.
Backup your data then explore all the options in AIMS, add dummy eggs etc and then when you have finished restore your real data set.
As of Version 11.3 AIMS does not restore your Permits folder.
This will be introduced in a later version.
You can simply unzip it into the C:\Visualaims\Permits folder.


