
This feature allows you to manage PDF scans of your bird’s permits.
It provides you with:
- A permanent record of the permit.
- An easy way to access copies of you permits for each bird during an inspection.
- AIMS will copy parent A10 permit scan automatically to the folder with your application files, simplifying even further the application process if you use AIM’s bulk permit application option.
- A simple way to copy permit scans to put into documents or emails.
- The ability to view the scanned file next to your permit record to verify the data.
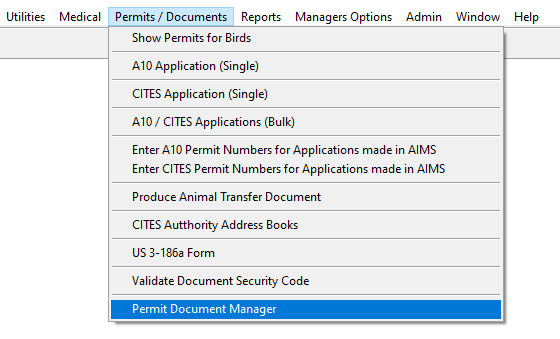
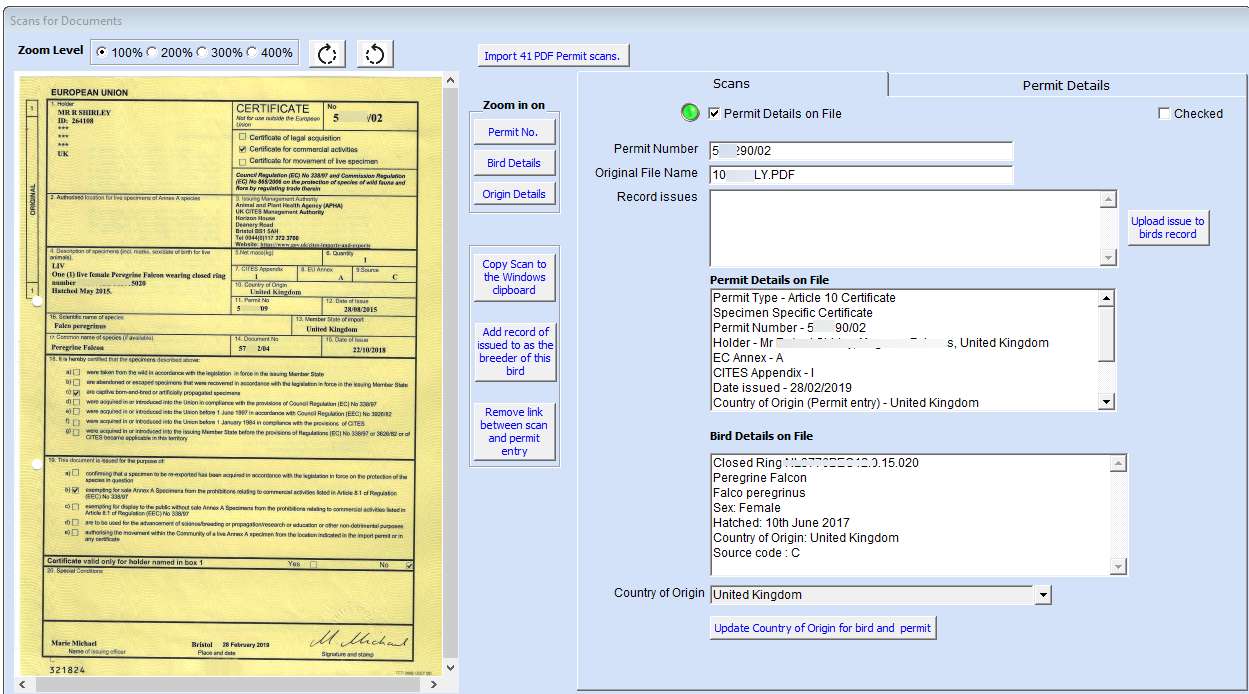
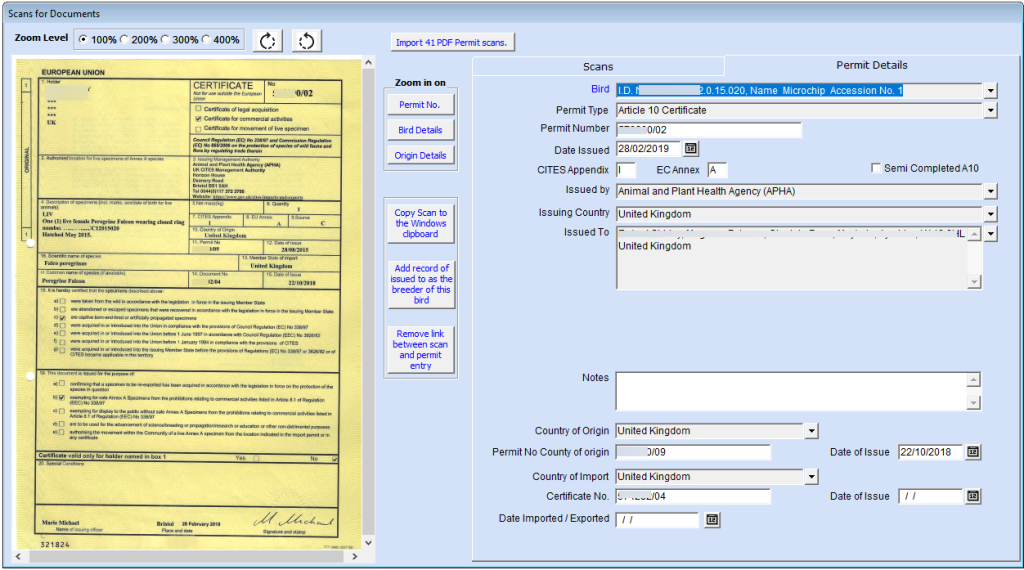
The scan of the permit is displayed on the left.
If the scan is linked to a permit record in AIMS then on the right are displayed the details of the permit entry in AIMS and teh bird details. There is a second tab for the actual details of the permit.
You can use this to check the scan information against your permit and bird records.
The centre of the form has 7 buttons.
Check for permits to scan.

This allows to check for permit scans to import, if you have placed them in the scan folder after you have opened this form.
If there are already any permts to scan in the scan folder when you open the form the wording on this will show something like this:
Zoom in on Scan.

- Zoom in on Permit number – Zooms in on the top right of the scan so that you can read the permit number.
- Zoom in on Bird details – Zooms in on the centre left side of the permit to show the ring number etc.
- Zoom in on Origin details – Zooms in on the centre right side of the permit to show the country of origin, country of origin permit details etc.

Copy the PDF file to the windows clipboard.
This allows you to paste it tinot emails or Word documents etc.

Add record of issued to as the breeder of this bird.
The permit details tab contains a field for A10 permits of the person the permit was issued to.
This will be an address in your AIMS address book.
If you have obtained the bird from someone else this will quite often be the breeder.
You can use this button to quickly create a record of the breeder for the bird as being this person.

Remove link between scan and permit entry.
If you want to remove the link between the scan and the permit entry for any reason, for example you have linked it to the wrong permit or you want to delete the scan and replace it with a better one, you can use this button to unlink the two records.
Above the scan is a zoom and rotate control
You can use this to zoom in on the scan and then use the scroll bars to move around it.
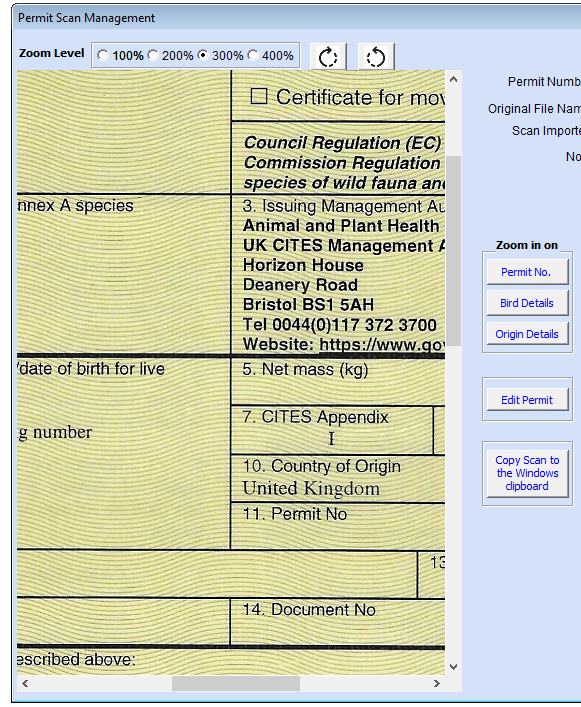
You can also rotate the scan if you need to using the rotate buttons next to the zoom control.
Adding Scans of your permits. #
You can add you permit scans to the manager either as a bulk loading or one at a time.
Adding bulk permit scans. #
AIMS creates a folder on you C drive named C:\Aims_files_to_scan
COPY your permit scans into this folder.
Unlike the single permit additions, the bulk load system deletes the files in this folder after it has processed them, so be sure to keep a copy of your scans in the original folder you copy them from for safe keeping.
When you now open the Permit Document Management form you will see a button on the top of the form that will tell you that there are permits to import.
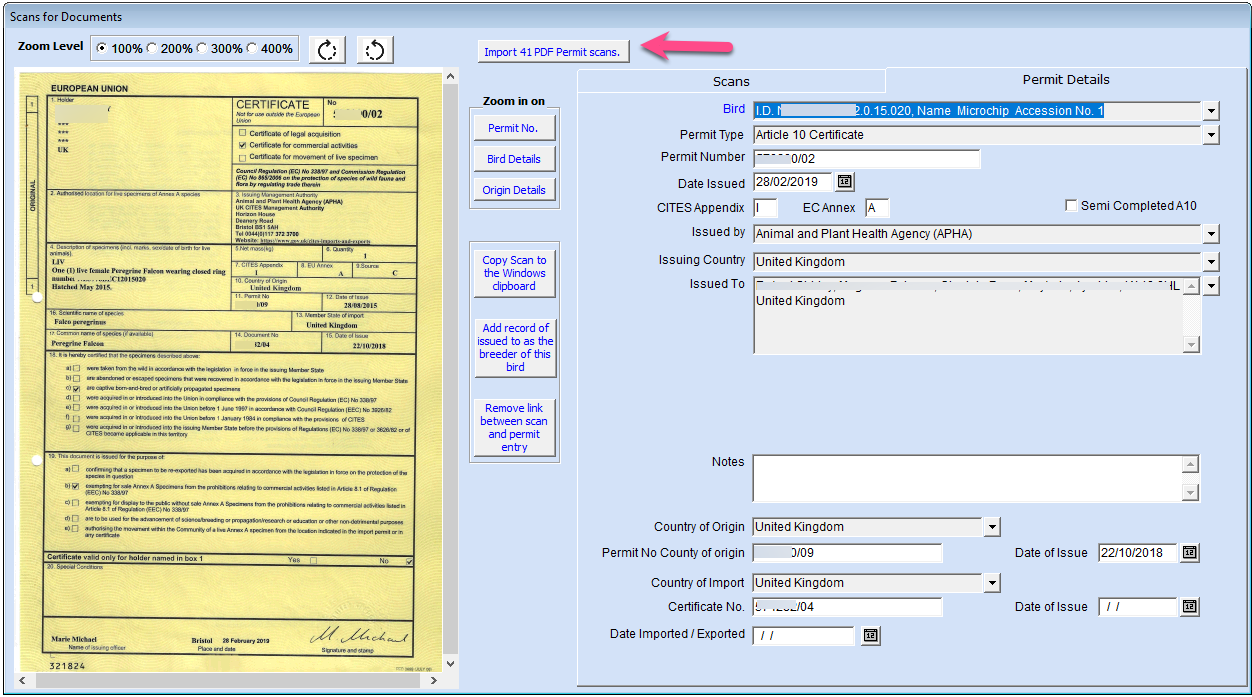
Click on this to import the permits.
The import routine will:
- Copy each of the PDF scans to the Permit folder, renaming them to it’s own internal naming convention.
- Delete the file in the C:\Aims_files_to_scan folder.
- Scan through the PDF file and try to match permit numbers you have in AIMS to the permit number in the PDF file. If a match is found it will automatically crate the link between the scan and the permit record in AIMS.
If you used Optical Character Recognition, OCR, when you scanned the permit it creates the PDF file as readable.
If you did not use OCR the scanner simply places an image of the permit into the PDF and this can’t be read by AIMS.
Even if OCR was used it does not always allow the permit number to be detected. If you used OCR check the resultant scan as we have seen extra spaces added into permit number and one case when a 1 was converted to an l.
CITES permits are printed on security paper which has a wavy pattern on their yellow background, this is designed as a security measure and can interfere with OCR scanning. A black and white scan can improve the OCR hit record.
If it cannot read a permit number in the scan, because it is an image PDF file for example, it will create the record and save the scan.
To read the permit number on the scan you can use the Zoom in on Permit number button.
You can then manually type the permit number into the number box on the top right of the form. When you tab out of this AIMS will use the permit number you have typed to match it to an existing permit record in AIMS.
If it finds a match it will disply the permit detasil on file and the details of the bird on file for you. It will also tick the Permit details on file checkbox above the details.

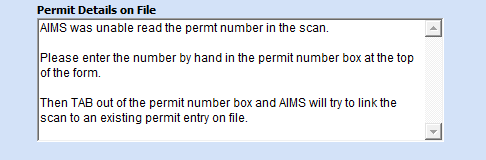
If it is unable to match the permit number to an exisitng record in AIMS it will display:
Checking the permit record and bird details against the permit scan. #
If you have a match then you can check the details of both the permit and the bird against the scanned permit.
To quickly update the country of origin for bird and / or permit record select the country on the first tab and then click the Update Country of Origin for bird and permit button.
Click on the permit tab and check the details here against the scan.
The details shown on this tab will vary depending on the type of permit.
Things to check for for are:
- That the ring on the bird matches the permit correctly.
If it does not you can right click on the bird entry on the permit tab and select edit.
This will bring up the bird record to allow you to correct it, assuming it is the bird record and not the entry on the permit that are incorrect. - Permit number country of origin and it’s date of issue, if the permit has one.
- Country of import of the bird was imported.
- Issued to is correct for an A10 permit.
- Sex is correct
Once you have checked all of the details and are happy with them, tick the checked box on the top right of the first tab. This will mark the bird record as Ring Data checked against permits.

It will also show a green symbol on the form next to the check box allowing you to easly see which entries have been checked.

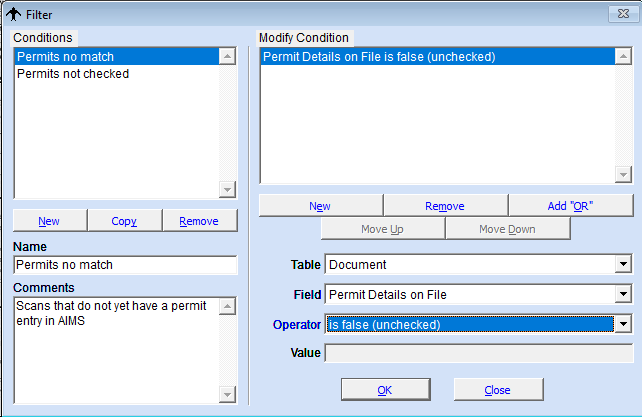
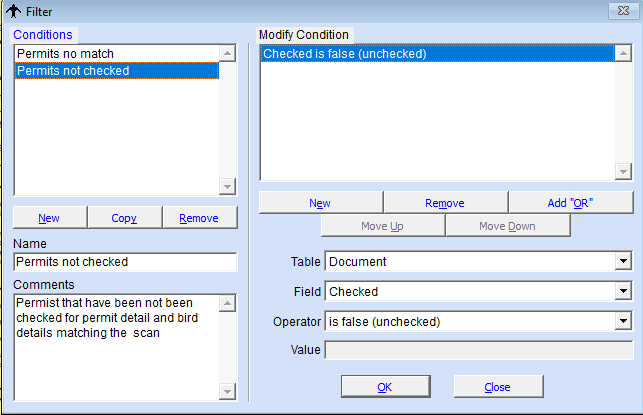
When working through your entries you can set a filter on scans that have no permit entry matchs or ones that have not been checked by using the filter control on the toolbar.
You would set these up in the filer control as shown below:
Adding single permit scans. #
Open the permit form and go to the permit you want to add the scan for.
The easiest way to do this is to open the bird that the permit is for and right click on the permits button at the bottom right of the bird form. This will open the permits form with just the permits for this bird.
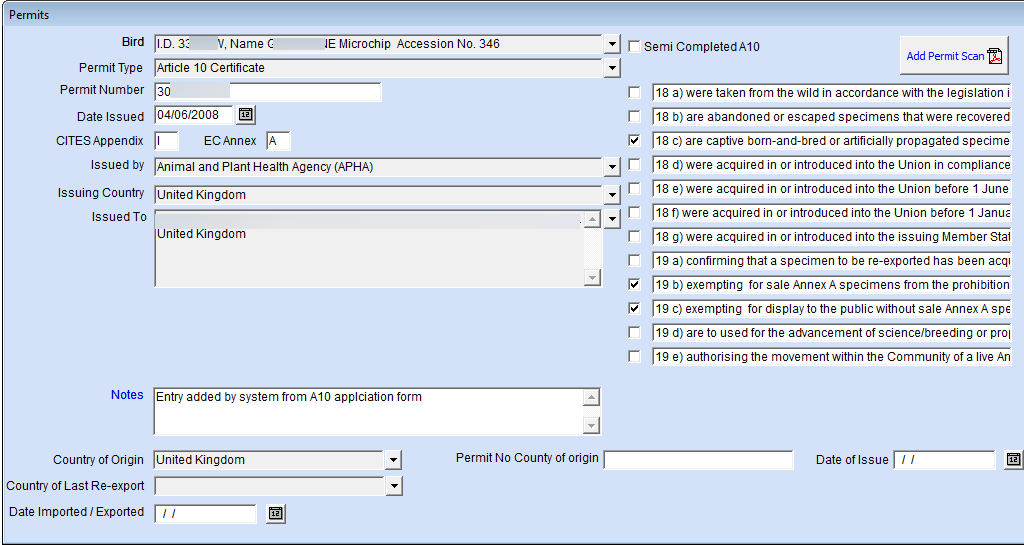
In the top right of the form is a button.
If there is already a scanned document for the permit this will say View Permit Scan otherwise it will say Add Scan.
When it says Add scan and you click on it AIMS will open a Windows file selection dialogue.
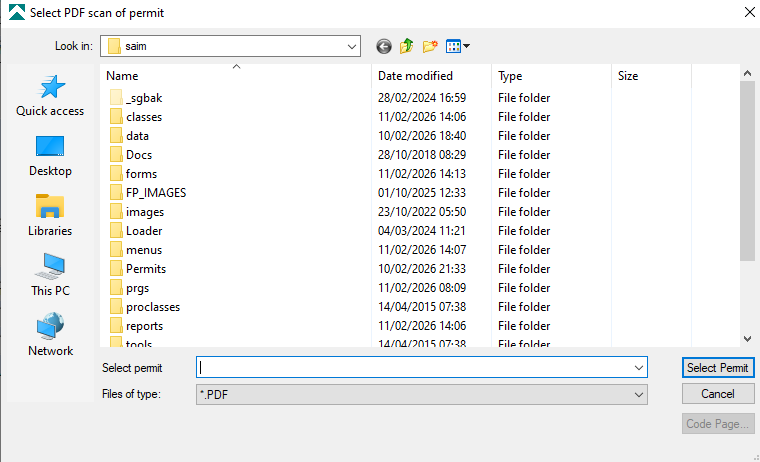
Navigate to the PDF scan of the permit and then use the select Permit button on the right hand side.
This will copy the scan to the Permits folder in the Visualaims folder.
If you are working on a workstation this folder will be on the machine that is holding the data, your server.
It will leave your original file where it is.
The Add scan button on the form will then change to View Permit Scan
When it says View Permit Scan and you click on it AIMS will open a form to view the details.
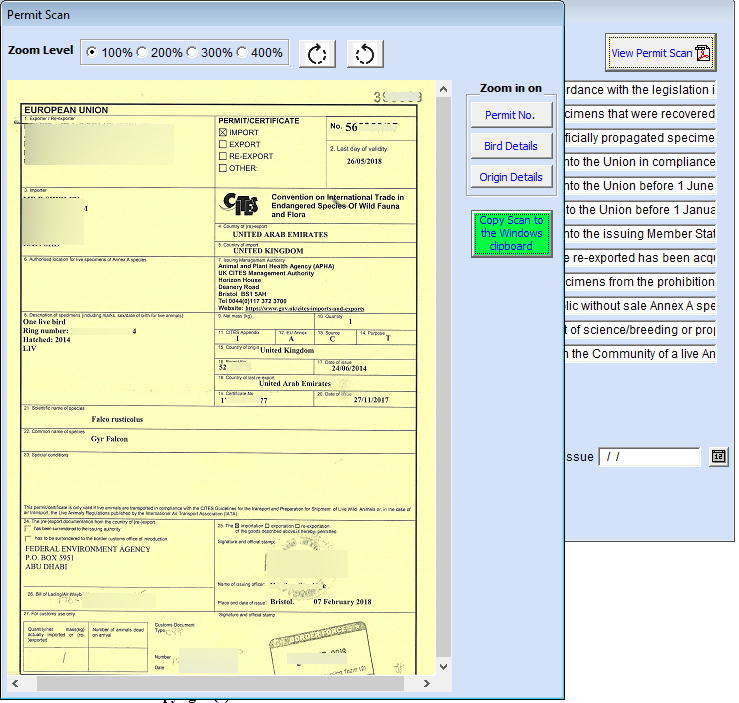
This is similar to the main Permit Document Management form, but just shows the permit and not the bird and permit records on file.
You can also print the permit by using the print button on the toolbar.
This form must be closed before you can go back to the Permit form.
It is designed primaraly to simply view, and copy the permit. It is better and easier to add them through the bulk load method.
Naming of files when you copy a permit. #
AIMS stores the permit scan in the Permits folder using it’s own internal naming convention. These look like this:
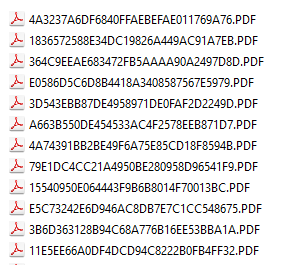
Obviously if the files are copied using this type of naming it would not be of much use to the user.
On the Pro menu you can configure how you want the scan names to appear when a scan is copied by AIMS when you create for example A10 applications and it copies the parents A10 scans for you.
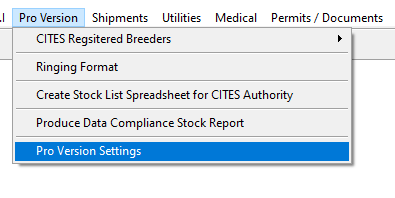
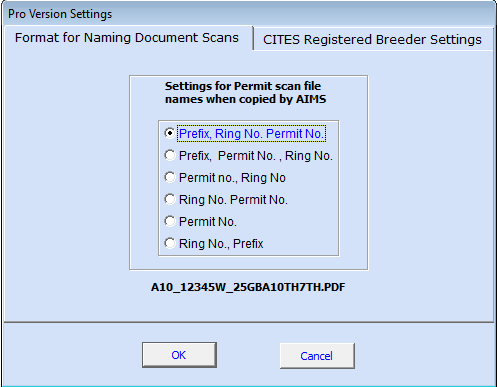
This gives the user six variation they can use for the name.
As you select each one a sample of that format will appear at the bottom of the page.
The default entry is Ring No. Prefix

The prefixes are:
A10 – Article 10 Certificate
CITES_I – CITES Import permit
CITES_E – CITES Export permit
CITES_REX – CITES Re-Export Permit
CITES_OTHER – CITES Other permit
CERT_O – Certificate of Origin
CERT_BR – Breeders Certificate
REG_DOC – Blue Registration Document
UNKNOW_TYPE – Unknown type
If there are any name permutations that you want that do not appear here please contact support and we can add them to the system.
When you then copy a scan to the clipboard this format is used for the name of the copied file.
The same naming convention will be used when AIMS will automatically copies parent A10 scans to the folder for the A10 or CITES application you make through bulk applications.
These together with the text file AIMS creates should be all you need for your application.


